cPanel has made it easier to manage your domains in a single place. In this post, we will go over how to add another domain to your existing cPanel account. This tutorial will require that you have a hosting account and have access to cPanel to add the domain.
What is an addon domain?
The cPanel “Addon Domains” feature allows you to manage multiple domains from a single hosting account. Unlike with Parked domains, Addon domains are expected to be completely different websites all hosted inside the same cPanel account.
Why addon domains?
You can use them to save money. With addon domains, you don’t have to purchase an additional hosting account for each domain you operate. You can simply create addon domains and split your existing account’s resources.
Addon domains. How do they work?
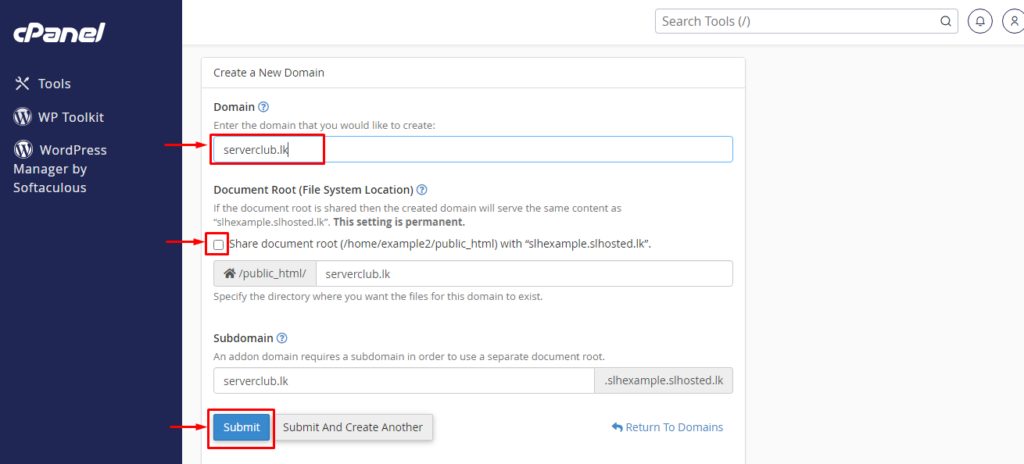
Like subdomains, addon domains are stored in a subdirectory in your home directory. Essentially, online visitors to your addon domain are routed to this directory. As shown below, you may specify the name and precise location of this directory when creating the addon domain. Most commonly, the document root for any addon domain will be in /home/$user/$addon-domain/. In our example, the addon domain’s public_html subdirectory will be /home/$user/cpdocs.com/.
How to add the addon domain to cPanel?
Before adding addon domain to your Cpanel, Ensure you have update our nameservers to your new domain name.
(Please find our nameservers from the “New Account Information ” email that our system sent when you purchase our hosting plan. )
- Login to your cPanel Account.
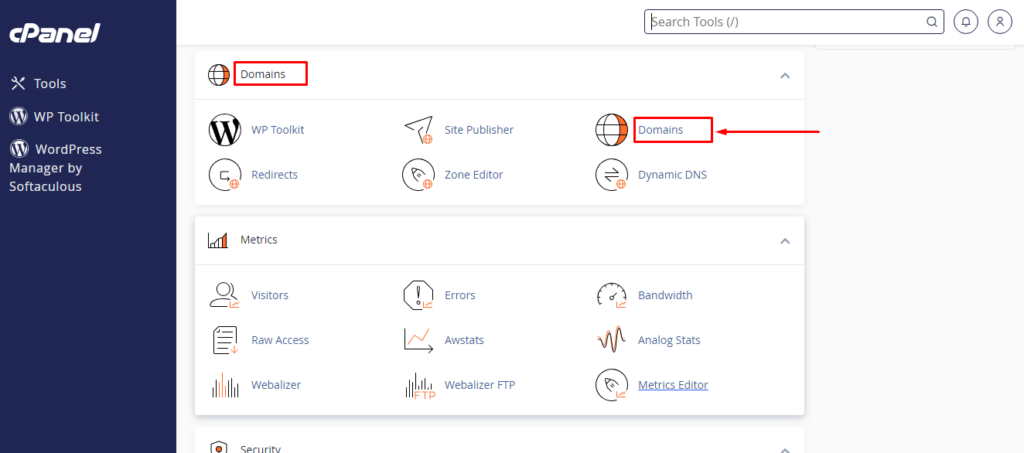
- To add an addon domain, we can use cPanel’s Domains feature, in the Domains section of the cPanel interface. (You can search like ” Domains ” with the search bar)
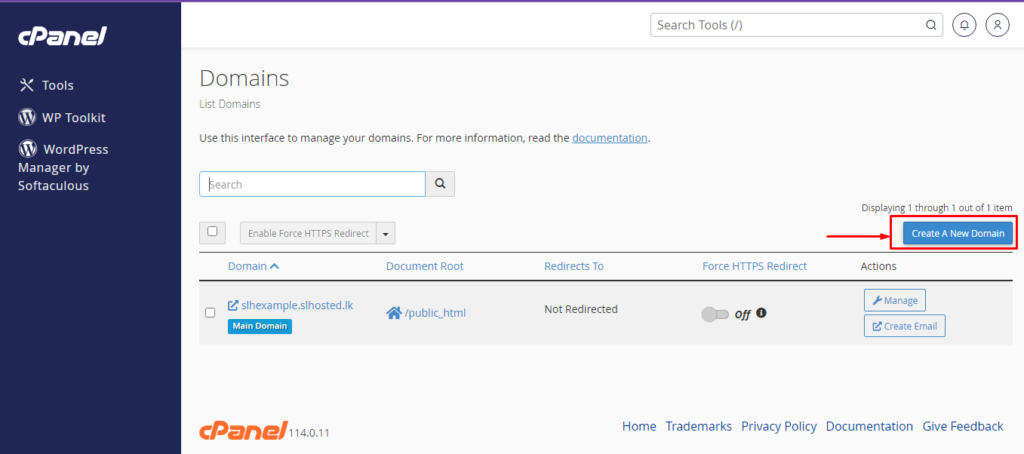
03. Select “Create A New Domain”
04. Go to these sections in order
1 –> Enter the Domain Name
2 –> Untick the checkbox
3 –> Select “Submit”